| 
ATV &
UTV Tech Tips : Rebuilding Utility ATV & SxS
CV Joints
::Continued::
Installing
the Rebuilt UTV / SxS CV Joint |
Once the axle is installed into the CV cup the
final step is to install the CV boot and clamp
it into place. The boot will fit over the CV cup
and the lip on the CV cup should hold the boot
in place until you can get the clamp in place
and tightened. The stock Yamaha Rhino axle has
a recessed spot on the axle itself that the small
end of the boot will fit into. The boot is ready
to be clamped and reinstalled into the rear end.
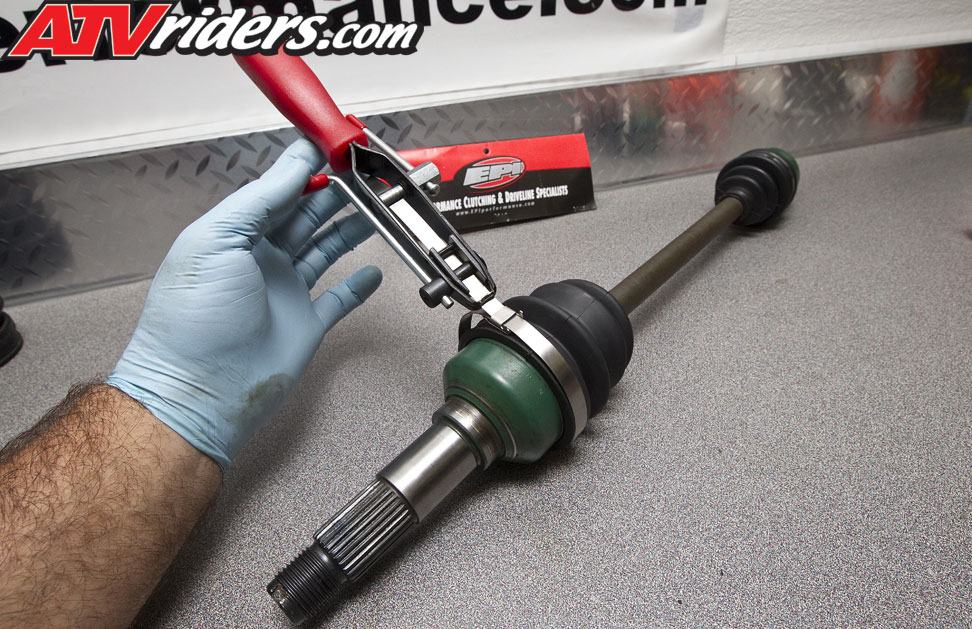
Using a standard banding tool from EPI we installed
the band clamps to firmly hold the boot but not
to tight that it could cut into the boot material.
|
| If
you plan on replacing your CV joint we highly
suggest purchasing a standard banding tool
to ensure your band is tight and won't slip
off the boot |
The final step is to reinstall the axle in the
rear end and begin to reassemble the rear suspension.
Be sure to grease the pivot points on the hub
and do not reuse the stake nut. A new stake nut
is only $10 or less and it’s a small price
to pay to keep the wheel on the axle!
|
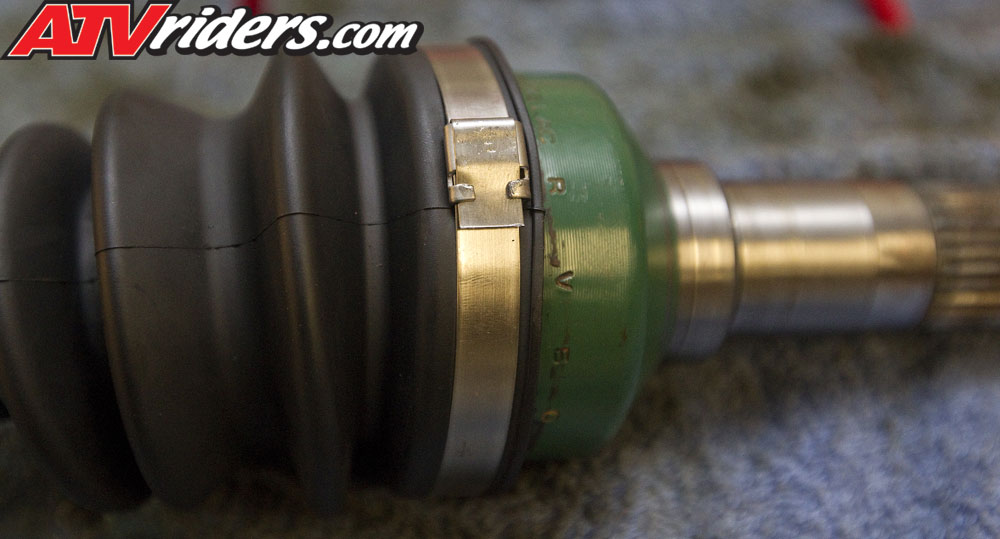
Be
sure that the clamp is snug under the retaining
tabs so it cannot be dislodged by debris
& won't grab a finger if you have to
clean around it |
This technical article is meant to be a guide
for light to experienced mechanics who like to
work on their own ATV’s or SxS’s.
This procedure involves risk that if not completed
correctly can cause personal injury. If you are
not sure about any part of this process seek professional
help at your local dealer.
Gorilla-axle CV rebuild kit: Yamaha Rhino rear
axle - $135
www.gorilla-axle.com
Standard banding tool – BDT80 $24.95
www.epiperformance.com
|