Elka 400EX
Linkage Kit
By: Rob Richeson (RICO)
02/06/04 - I'd like to start
this review with my thoughts on how this setup works compared
to a standard travel Elka rear shock. I’ve ran a standard
Elka shock for a little over one year and have been very pleased
with it. My rear shock was setup for 100% Cross Country style
riding/racing. I've used it on MX tracks and just turned the
compression and preload way up to compensate the large jumps.
It soaked up everything on the track that I could give it.
The small breaking bumps were a little rough but you can't
expect a XC shock to work well on the MX track when that's
not what it was built for. The rear shock worked well in just
about all areas but no matter what adjustments I made it still
wanted to swap around and buck in long rough sections. It
wasn't bad enough that it beat you to death but it made for
a rough ride and would wear you out faster in a race or long
ride
Before the Texas GNCC race this past weekend
I was able to install the Elka Long Travel Kit on my 400ex
rear end. I set the sag to Elka’s specs and figured
I would adjust the rest and fine tune it when I got to Texas.
After arriving in Texas, I jumped on the quad
and took off for the practice track. Within maybe 2 minutes
on the quad, in some VERY rough terrain, I was absolutely
AMAZED in the performance the new shock. I ran one full lap
and figured it could be a little softer and that the rebound
was just a tad to fast. I turned the rebound down 2 clicks
and compression down 3 clicks. I went back out for 1 more
lap, and I was even more amazed at how well linkage really
worked. I purposely hit large humps, ruts, washed out areas,
and rocks running across the trail faster than I would have
before this setup, just to see if it would kick up or swap
back and forth. Well, I couldn't get it to do anything, but
work like it was designed. You riders know the feeling when
you’re going down a trail and there's a washed out spot,
you carry the front wheels over, let the back drop down in
the rut and WHAMO. The rear end hits like a ton of bricks,
and up comes the rear end like you’re on a bucking bull.
Those days are over people because it will soak it up and
all the other obstacles in the trail that you've slowed down
for in the past. It was actually kind of hard to get the confidence
to push the quad to the its limits "Well I might go over
the bars and wreck if I do hit this spot with this much speed."
I truly can't say enough good things about this setup, and
I could go on for hours, but I won't. There’s no doubt
in my mind that this kit WILL make you a faster and smoother
rider, but it's up to you to have the confidence to push it
to the limit.
Installation:
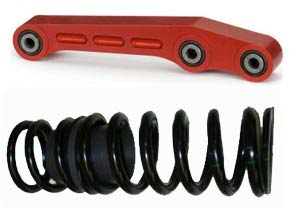
The Elka linkage moves the shock into a more vertical position
which is were the extra travel comes into place. The ONLY
downfall to this new linkage is that it sits ¼ of an
inch lower than the stock linkage which in turn will rub against
some manufacturers skid plates. I placed washers in between
the swingarm and skid plate on the front mounts to fix the
problem. Another solution would be to cut a section out of
the skid plate where the linkage rubs. The good thing is that
the clearance issue is only at the front of the skid plate
next to the frame and under the pivot bolt, and not at the
back were ground clearance is an issue.
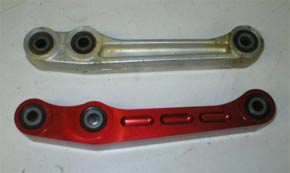
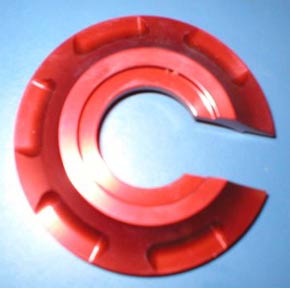
In the pic below you can see the difference in the stock linkage
(top) compared to the Long Travel Linkage from Elka (bottom).
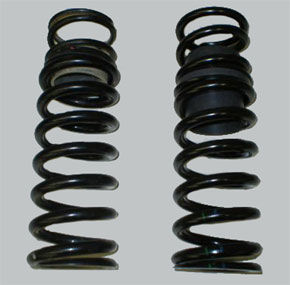
The difference in the springs
and crossover rings are significant. It’s
hard to notice but the top spring on the left
has a much lighter coil to it than the spring
on the right. You might be thinking well the
one on the right is not an SSD spring. You’re
correct it’s not an SSD spring but the
shock still has the Self Sagging option and
will NOT sit higher than the front if you
run SSD springs on your front shocks. The
crossover ring is also larger to transfer
the weight more evenly and at the appropriate
time during the shock’s travel.
Please DO NOT be confused, this rear shock is
an SSD shock and will work perfectly with any Elka front shocks
with SSD springs. Actually, it would work great with any front
shock setup with SSD.
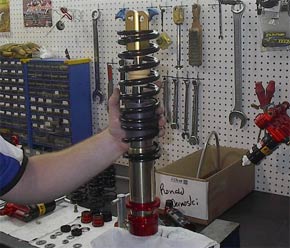
You do not have to be a shock
technician nor do you need special tools to
install this kit. Place the shock in a vice,
back the preload off completely and remove
the bottom spring retainer. (Pic 1) The retainer
can be removed by pulling down on the springs
and you slide the retainer off the shaft via
the gap.
(Pic 1)
With the retainer removed both
springs and crossover ring should slide off
the shaft. (Pic 2) Spray the threads down
on the shaft with WD-40 and wipe away any
grit or dirt that are on the threads. Reinstall
the new springs and crossover ring and tighten
down the preload slightly. (If you are not
comfortable or confident in taking your shock
apart send it to a trained technician) You’ll
need to set the sag on the shocks once the
shock is installed on the quad so don’t
spend much time adjusting the preload.
(Pic 2)
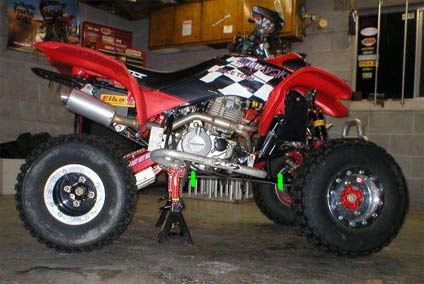
After the shock has been reinstalled,
the sag should be set at 8.5 to 9 inches with
the rider on the quad. The front should also
have the same amount of sag. The green lines
in the pic below show were to measure sag
at both front and back of the frame.
Wheel travel with only the Elka rear shock
is 10.1 inch (increased by 1 inch over stock)
and with the linkage you get 10.9inch (0.8
more than just the Elka rear shock).
In the past people were cutting and rewelding
the frame to move the upper shock mount. The
idea of cutting and rewelding a frame is not
the best thing.
Another advantage of the Elka rear 400EX linkage
is to give a different curve in the rising
rate in the motion ratio. Instead of having
a very small soft part at the beginning of
the travel you will have a very long plush
part, at the end it will rise to give you
a good bottoming out resistance.
With the rear wheels slightly
touching the ground, I had 13 inches between
the ground and rear part of the frame. That
is very impressive ground clearance that really
shows while hammering down the trail.